On-Demand Pentest
Getting started with an Agentic Pentest on the Ethiack platform.
The On-Demand Pentest onboarding is designed for organizations that want to run a focused Agentic Pentest without committing to a continuous testing programme. After completing the setup, a new Agentic Pentest will be automatically launched and begin executing immediately.
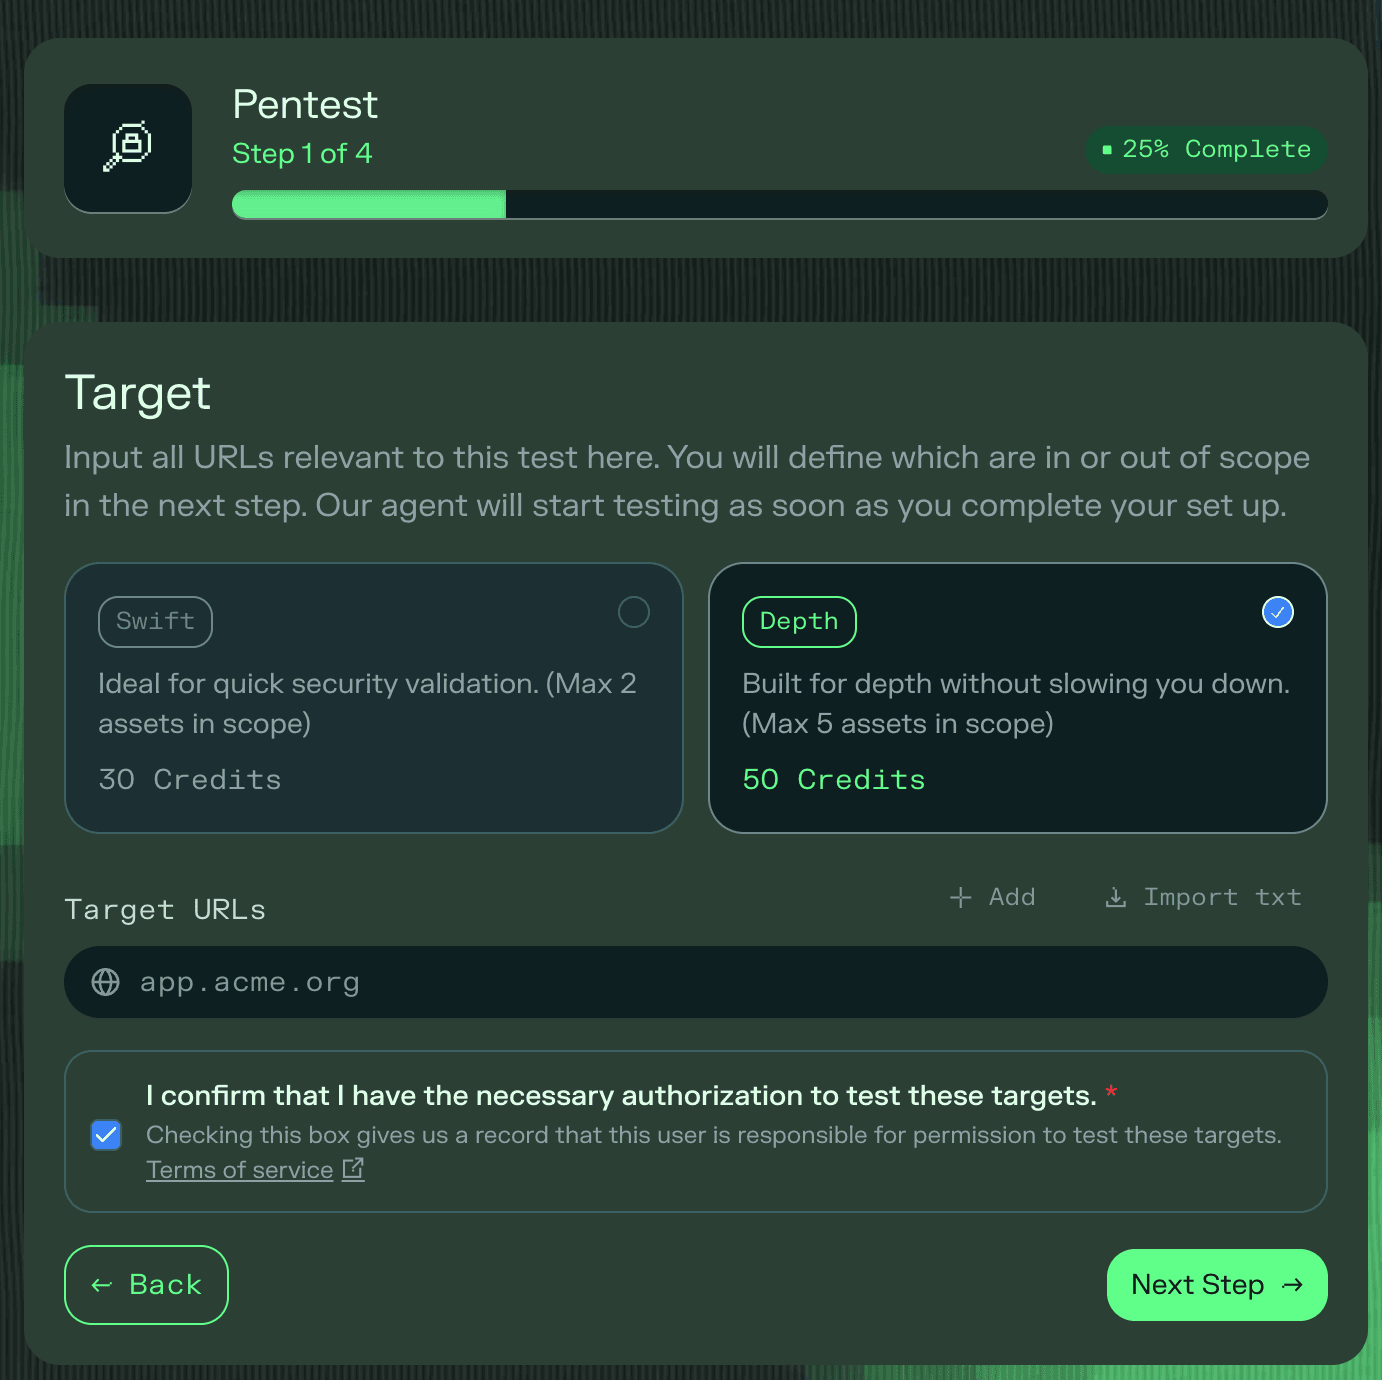
Step 1: Select test type and targets
Choose the type of Agentic Pentest you want to run and list all the assets you want to include in the test. This is where you define the full set of assets that will be considered for scope; you will be able to mark individual assets as in or out of scope in the next step.
| Swift | Depth | |
|---|---|---|
| Asset limit | Up to 2 assets | Up to 5 assets |
| Testing mode | Black box only | Black box or grey box |
Step 2: Scope
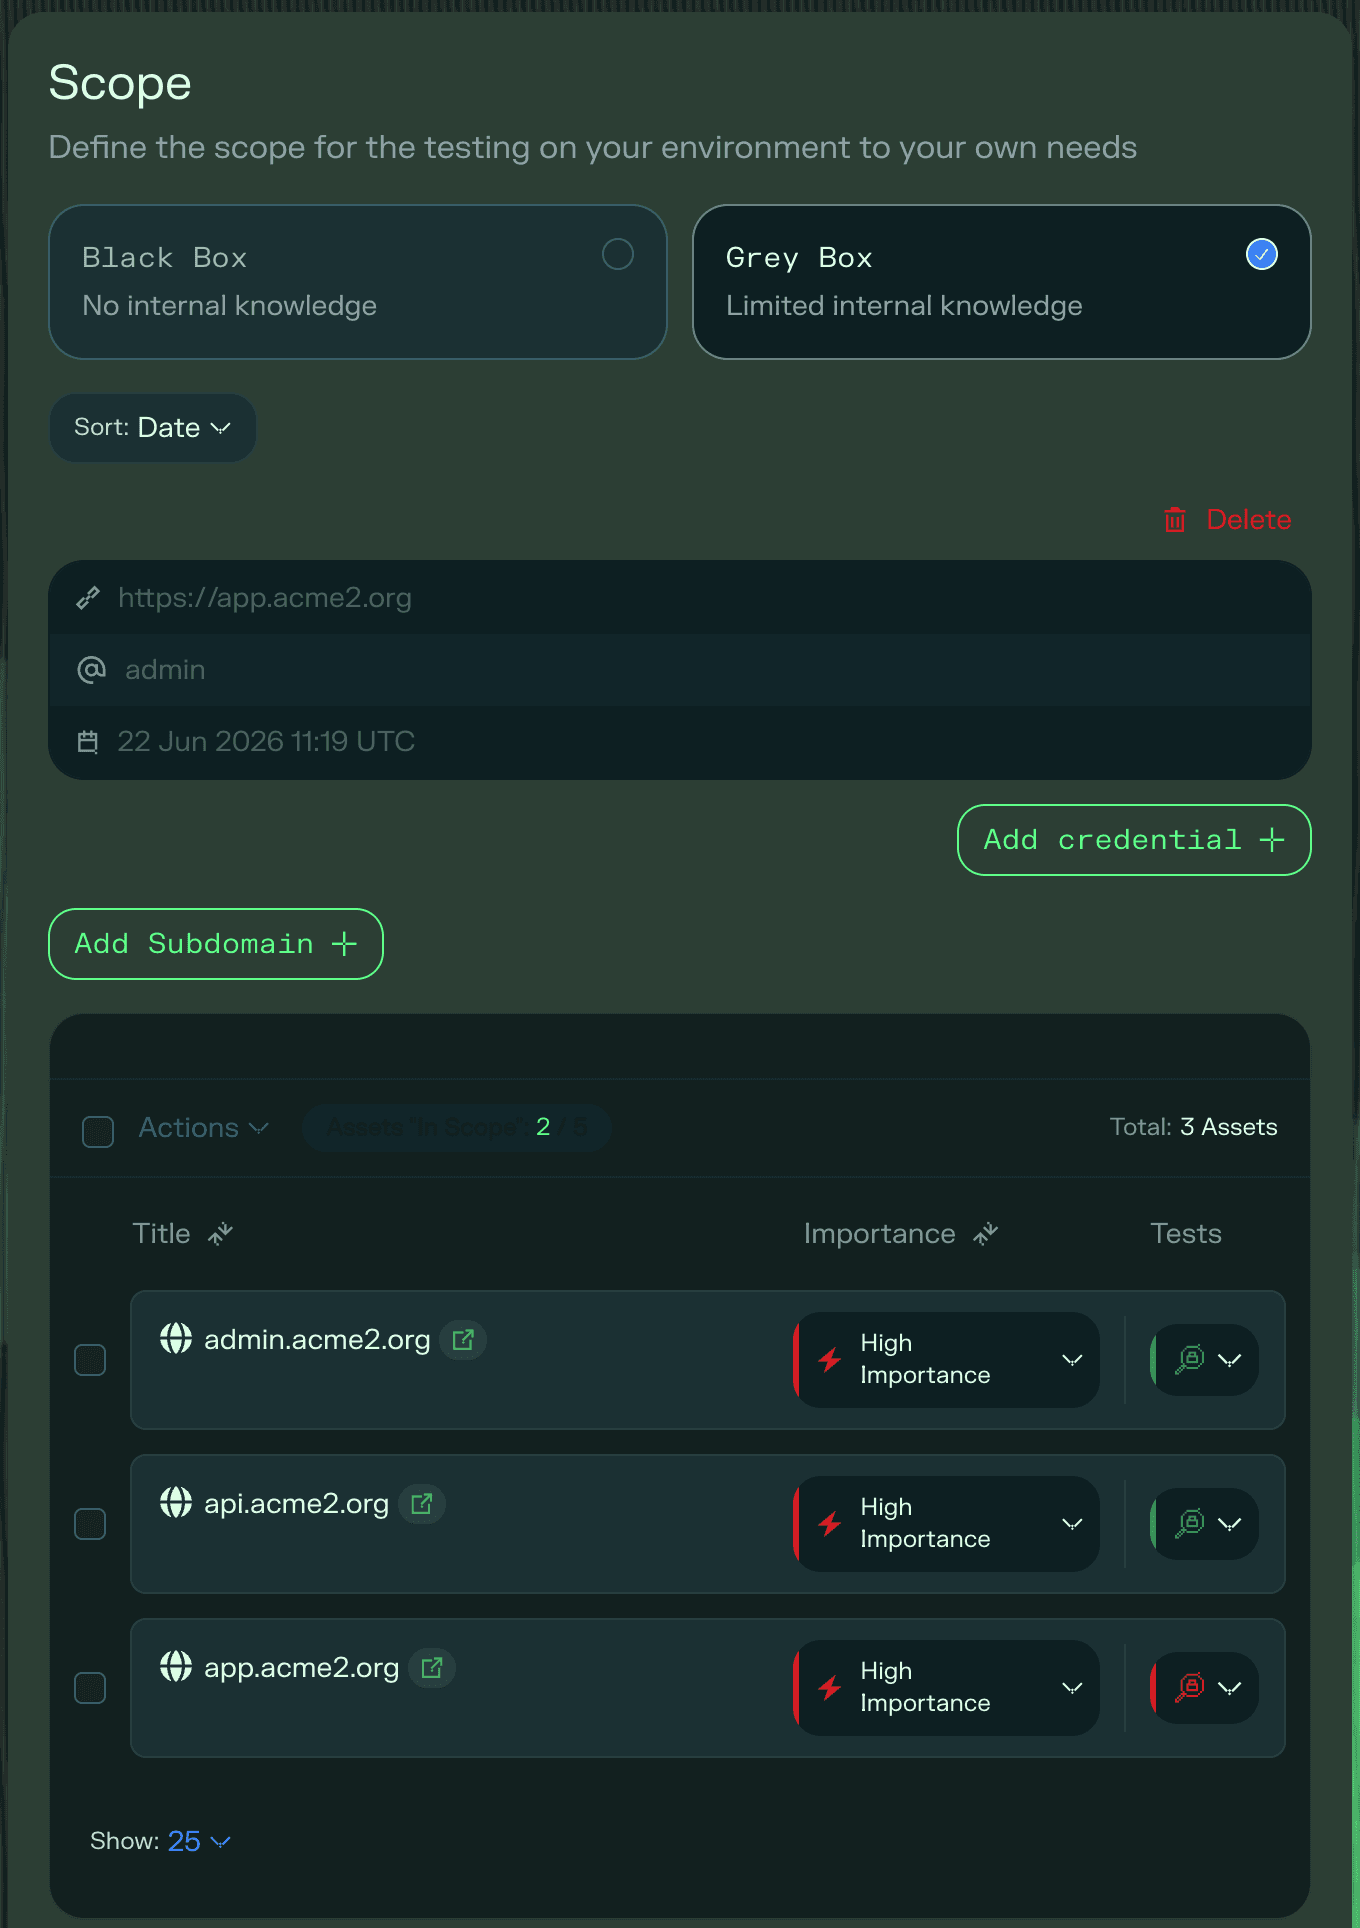
Define the scope of your test. This is where you confirm which assets are in scope and which are excluded from testing.
For Depth tests, you will also choose your testing mode and provide credentials if applicable:
- Black box: Ethiack tests with no prior knowledge or credentials.
- Grey box: Ethiack tests with authenticated access. You will be asked to provide credentials to enable this mode.
Swift tests always run in black box mode and do not have a credentials step.
Step 3: Define your testing policy
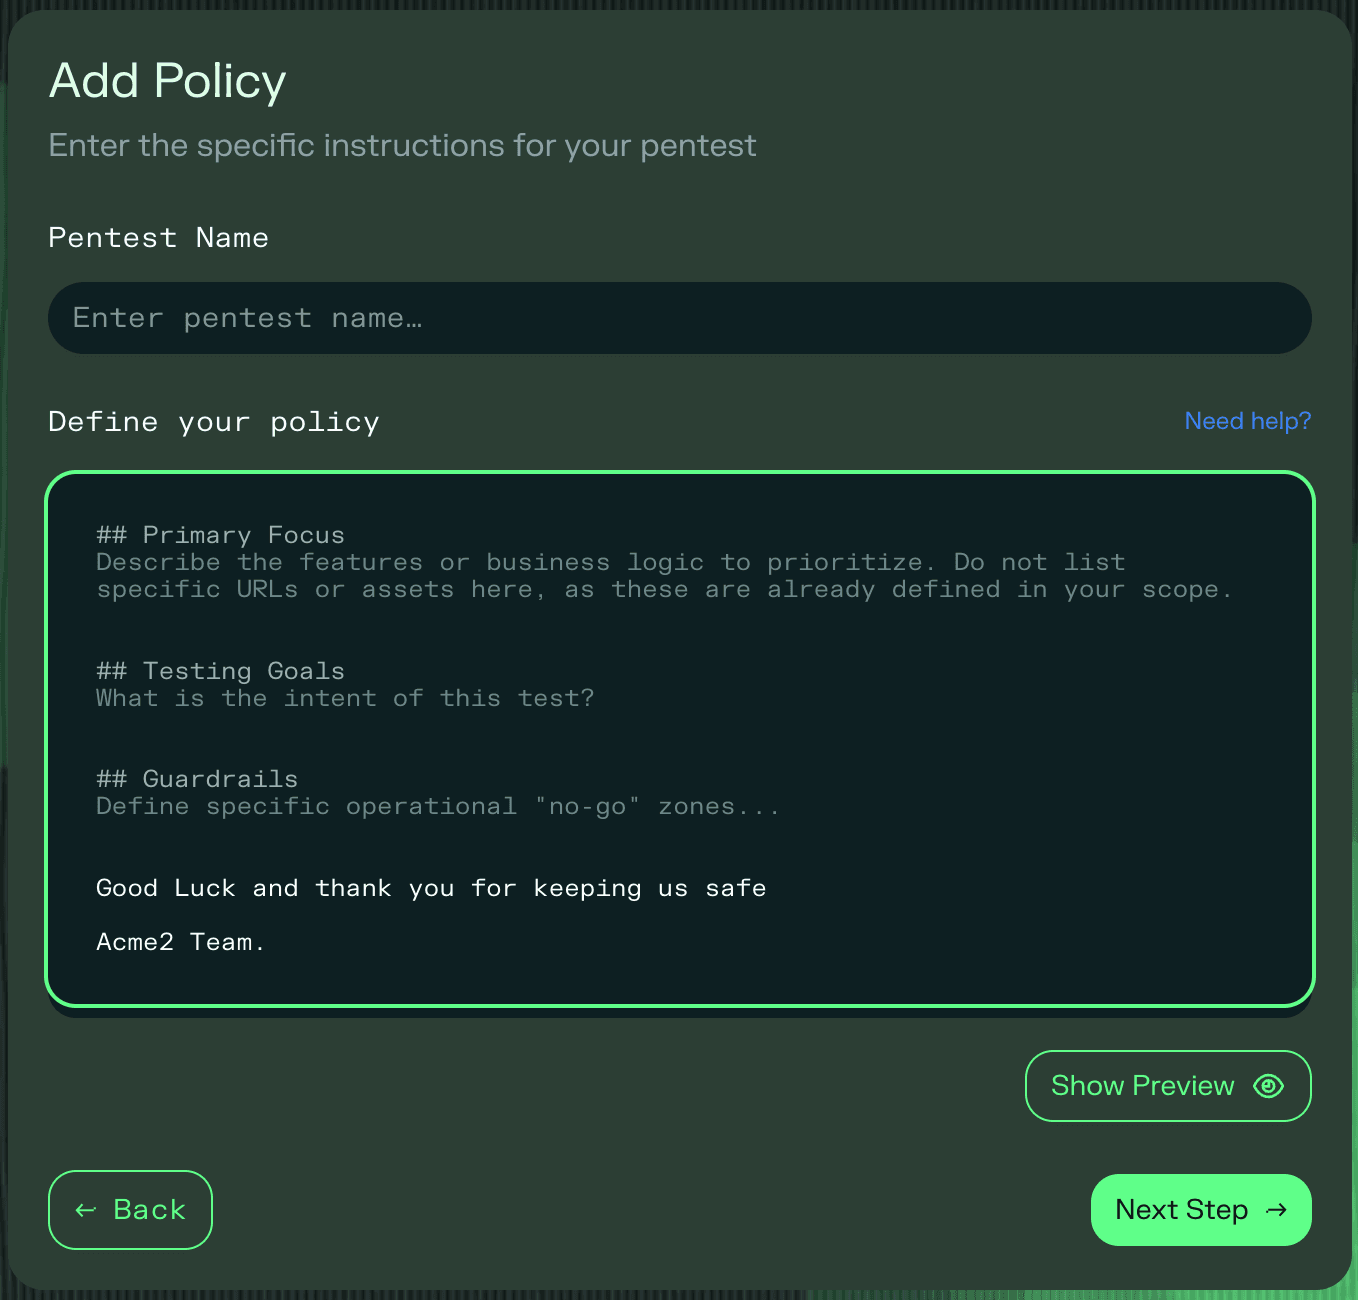
Define the policy that will govern the pentest: the scope, rules of engagement, goals, and any constraints the Ethiack Engine must respect. See the Agentic Pentest Policy Guidelines for guidance on how to write an effective policy.
Step 4: Review and launch
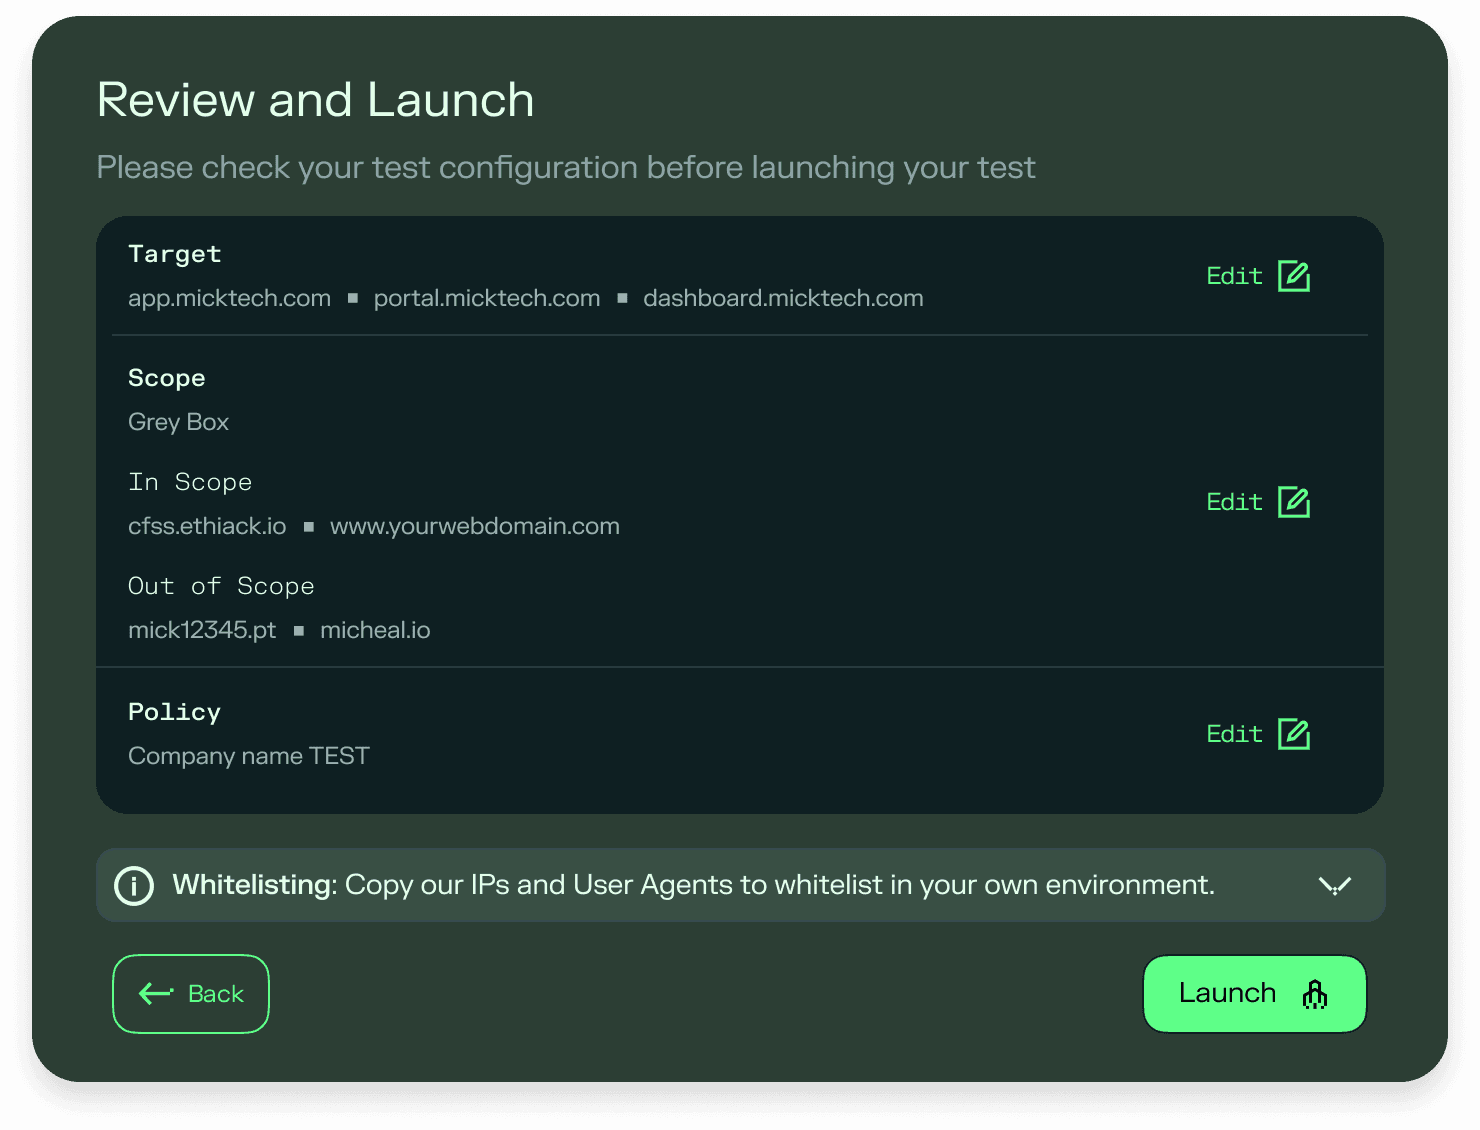
Review the full setup before launching. On this page you can:
- Confirm the assets in scope.
- Add any exclusions you want to define for the test.
- Access a list of IP addresses, User-Agents, and custom headers used by the Ethiack Engine, so you can whitelist them in your WAFs, SIEMs, and EDRs as needed.
Once you click Launch, the Agentic Pentest will start executing automatically.